
Movement helps control back pain whether it’s new or old. All the experts and professions pretty much agree on this. Research into figuring out which movements are best for back pain is a recent event. Unfortunately, many exercises that are commonly suggested for back pain can end up making things worse. The big idea is to find movements and exercises that can do two things at once:
1) They must be safe: They can’t have a high risk of injury.
2) They must be effective: Too “easy,” and they won’t work.
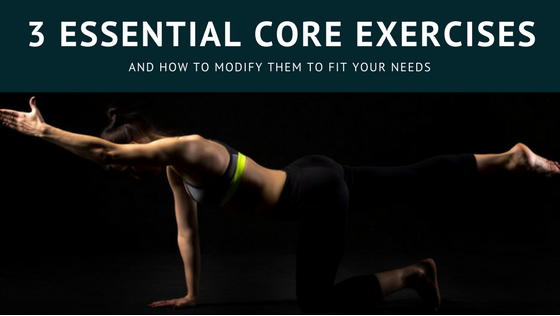
The goal of core exercise, in general, is to help stabilize the spine. Stable spines heal better and are less likely to be injured again. The core is a term that refers to the complex combination of muscles that support and stabilize the spine. The whole list is long and tedious, but can be broken down into three crucial areas:
1) The front: The abs, or the “six-pack.”
2) The sides: Muscles that connect the bottom of the ribs and the top of the hip crest.
3) The back: The two big ropey muscles down the side of the spine and the buttocks.
These areas are all essential, and each must have muscular endurance and strength. If all three regions function well the spine can stay nice and stable.
Without further ado, let’s take a look at the actual exercises that we recommend doing to build endurance in the core muscles and to strengthen the muscles while keeping the spine safe and the risk of injury low.
#1: The “Lift-Up”, a better version of the sit-up that gets the abs activated without putting a ton of stress on the low back.
This exercise is performed by lying on your back with one leg flat and the other bent at the knee with the foot on the floor. Place your hand under your low back to help maintain a natural neutral spine, or lordosis, which is a curve that points towards your belly button. You don’t want to flex your spine like you would in a normal sit-up. The spine stays strong, stable, and still during this exercise.
Start the exercise by squeezing your abs and lifting your neck and shoulder blades off the ground until you have a strong squeeze in your abs. Remember to breathe while you hold this pose! We recommend holding for 30 seconds.
Switch the position of the legs and perform again. Repeat three times per side. Do the next two exercises before you do the lift-up again.
#2: The “Side Plank”, an exercise for the often neglected muscles on the side of your torso.
We tweak this classic exercise to give it an extra twist that makes is a little bit easier on your knees and shoulders. The side-plank works the muscles that connect the bottom of your ribs and the top of the hips. Strengthening this area helps take some of the load off of the muscles of the low back.
This exercise is performed by laying on your side resting on your elbow with your knees bent. Make sure your elbow is directly beneath your shoulder so that the arm bone is pressed directly into the shoulder socket. Lift your hips off the ground and squeeze your butt muscles so that your body makes a straight line from your nose to your belly button to between your knees. You should feel the muscles on the side of your body facing down squeeze.
Again, remember to breathe while performing this exercise. We recommend holding for 30 seconds per side. Be sure to perform this exercise on each side before moving on to the glute bridge exercise. Remember to repeat this exercise three times per side.
#3: The “Glute Bridge”, an exercise for your back and your butt.
The glutes (your butt muscles) are extremely strong muscles. If they are dysfunctional, your low back muscles get overworked and become painful. The glute bridge exercise helps to build strength and endurance into the glutes, which can help reduce low back pain.
This exercise is performed lying face-up on the ground. Place your feet on the ground so that your knees are bent. Your feet should be about 6 inches away from your buttocks. Maintain a neutral spine throughout this exercise, don’t arch your back!
Perform the exercise by lifting your buttocks off the ground until your legs and torso make a straight line. Once you reach the top of the movement relax back to the ground. Start with 15 repetitions and work your way up to 30 repetitions if you can. You will get a good burn going in your butt muscles!
You can make this exercise more challenging by adding a resistance band around your legs right above your knees. Simply perform this exercise just like you did before. The band will add some challenge to the gluteus medius and tensor fascia lata muscles, which are in the top corners of your buttocks.
Now that you’ve seen the exercises, you probably have some questions. We hear some common ones, so let’s answer those right now.
Q: So how many times do I do each exercise?
A: Remember the rule of three. Do each exercise three times. If the exercise is a hold, try to hold for 30 seconds. If the exercise uses repetitions, try to perform 30 repetitions. So for the lift-up and side plank, you’ll do each side (right and left) 3 times and hold for 30 seconds. That means you’ll be doing 3 minutes of lift-ups and 3 minutes of side planks in this program. Since the glute bridge doesn’t have a left and right side, you’ll do them 3 times for 30 reps, which should take about 3 minutes.
Q: How often should I perform these exercises?
A: The answer is daily! No question about it. Once per day is the perfect amount, there is some research to suggest that doing these exercises only three times per week might not work. Don’t waste your time and effort, do them each day like brushing your teeth.
Q: How long should I do them for?
A: Longer than you’d think. It seems like these exercises might work best when done for AT LEAST 3 months. Your back was probably injured by the combined impact of many small injuries over a long period of time, and it simply takes time for the spine to heal naturally.
Q: What if they are too hard?
A: Try to work up to the 30 seconds or 30 repetitions slowly if they are too hard. Try doing 6 sets of 10 second holds or 3-5 sets of 10 reps until you feel stronger.
Q: What if I have pain while performing them?
A: Don’t give up immediately, but be cautious. These exercises generally shouldn’t hurt. Stop if your pain worsens or greatly increases after doing these, consult with one of the Board Certified Physicians at Airport Plaza Spine & Wellness. If your pain is pretty mild or just uncomfortable, try to stick with the program and focus on using good form and holding your spine neutral.
If you have knee pain while performing the side plank or glute bridge, try switching up your foot or leg placement. You may need to work on knee rehab if you just can’t perform these without knee pain. If you get shoulder pain while doing the side plank make sure your arm bone is being pressed straight into your shoulder blade, and isn’t diagonally up or down. If your neck hurts while doing the lift-up, use the arm that isn’t under your low back to support the neck.
Q: Should I be stretching my back?
A: Actually, you probably don’t need to be stretching your back, research clearly shows that back injuries can get worse if stretched in the wrong direction, and not many people have genuinely stiff spines. We recommend you focus on core exercises first, and then consider stretching programs after you’re confident you’ve mastered these exercises.